GCam Port | Google Camera APK v9.2 (April 2024) › Forums › Forum for Common Topics (Generic Topics for all Devices) › TWRP – Team Win Recovery Guides › How to Install TWRP Recovery on Android Using Fastboot
- This topic has 47 replies, 29 voices, and was last updated 4 years, 11 months ago by Linux User.
-
AuthorPosts
-
February 16, 2019 at 5:42 AM #72862Linux UserParticipant
Hello, well, I have a problem with TWRP on Moto G3 TE (Merlin) , my status bar are in red and i can’t do anithing, I couldn’t flash anything onto my phone, what i can do??? HELP PLSSS
February 18, 2019 at 2:09 PM #72990SibaKeymaster[quote quote=62863]samsung galaxy tab a sm-t350 downloaded twrp-3.2.3-0-a8hplte.img.tar
how long should my screen say downloading do not turn off target?[/quote]The image should be downloaded in seconds I believe.
Are using the tar file using fastboot?
If yes, then this is not the right way.Use the following guide to install TWRP recovery on Samsung phone
March 27, 2019 at 11:35 PM #77168Linux UserParticipantstuck on
fastboot flash recovery_ramdisk twrp-3.2.3-0-cedric.img
it says
< waiting for device >
anyone know how to fix
April 1, 2019 at 1:24 AM #77489SibaKeymasterSo, the PC is unable to identify your phone.
Either the phone is not in bootloader mode
Or there is no fastboot USB driver installed for your phone.May 5, 2019 at 4:53 PM #84771Linux UserParticipantHi,
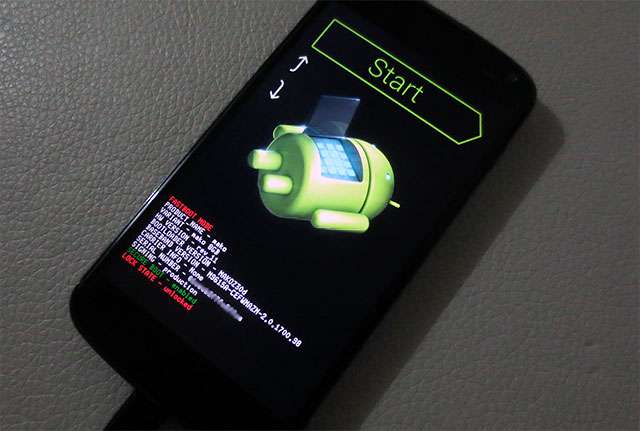
I am trying to install TWRP recovery on my Moto G (1. generation). Every time I run cmd to install it, I get the message “waiting for device” (look at the picture) and I am not able to write another command into it. I am not sure why it does not working. I would be very thankful if someone could help me!
May 5, 2019 at 6:13 PM #84785Linux UserParticipantHi again,
the further proplem I had with the message “waiting for device” is fixed now. I just repeat the booting process. But there is still a problem at this step. Now I get the message that it is not possible to load the image file (as you can see in the picture).
May 14, 2019 at 3:42 PM #85776Linux UserParticipantThese steps are very much confusing, I want to flash my asus_Z00UD to Oreo 8.1 can’t we flash new Rom without PC or LAPTOP as I don’t hv any of these .
I did try using my friend LAPTOP , but was not able to follow steps after doing ADB my phone was stuck on flashing boot screen & TWRP option was not poping up.
Please email me steps wise in detail as I am very much new to this. Please mention where to store the downloaded file on phone internal or sd card
Instead of writing so much about steps I think video is better option
April 24, 2024 at 3:34 PM #3506Linux UserParticipantHere is a simple Step By Step guide explaining How to Install TWRP Recovery on any Android device using Fastboot. There are many ways by which you can install TWRP on your phone or tablet out of which flashing the TWRP using fastboot is one such method.
If you are a beginner to these things like the TWRP or fastboot then I will tell you in simple words that the fasboot is a utility provided by Google to deal with fastboot ot bootloader mode on an Android device. Android has many partitions as a complete System, such as: Boot partition, Recovery partition, System partition, Cache partition, Userdata partition etc. Basically this fastboot mode is used to update these partitions manually. Here we are going to use fastboot to flash the TWRP Custom Recovery or install a GCam on an Android phone or tablet. Basically TWRP is a customized Android recovery available for many but not all Android devices.
DISCLAIMER:
Installing TWRP custom recovery may require your Android’s bootloader to be unlocked and may VOID your warranty and may delete all your data. Before proceeding further you may consider backup your all data. You are the only person doing changes to your phone and I cannot be held responsible for the mistakes done by you. Neither the developer nor we can be held responsible for any disaster that happens to your device.
REQUIRED LINKS AND DOWNLOADS TO INSTALL TWRP ON ANDROID PHONE OR TABLET USING FASTBOOT:
- Unlocked bootloader on your Android. Here is a Bootloader unlock guide which may help for your device.
- ADB and Fastboot installed on your PC or MAC.
– 15 Seconds ADB Installer for Windows
– Minimal ADB and Fastboot for Windows
– ADB Fastboot Installation guide for Linux and MAC - TWRP image for your device.
- Enough battery backup. (More than 60% of battery charge will be good enough)
- A PC with USB driver installed for your Android.
HOW TO INSTALL TWRP RECOVERY ON ANDROID USING FASTBOOT:
- Download the TWRP recovery image to be installed on your Android. Make sure that the TWRP recovery is meant for your Android device ONLY.
- Enable USB Debugging under Developer Options. If you don’t know how to do this then here is How to Enable Developer Options and How to Enable USB Debugging under Developer Options.
- Install ADB and Fastboot utility on your PC or MAC. Follow the appropriate guide to install Fastboot according to the OS that you use:
15 Seconds ADB Installer or Minimal ADB and Fastboot for Windows
ADB Fastboot Installation guide for Linux and MAC. - Go to the directory where you have downloaded the TWRP image file and then open the command console or termianl on this directory on your PC. To open a command window on Windows OS in the current directory, press shift + Right Click anywhere on Windows explorer, or some folder. Then on the menu opened, just press the “w” key on the keyboard or select “Open command window here” to open a command window.
- Now connect your Android to the PC using a USB cable.
- Know if you have a A-only device or an AB device. Execute the following ADB command to know that:
getprop ro.build.ab_update
[su_note note_color=”#D7E3F4″ text_color=”#728095″ radius=”3″ class=”” id=””]If the returned value is true then your phone is an AB device. If it is empty it is an A-only device.[/su_note] - Enter the following command on the command window opened:
adb reboot bootloaderto put your Android into bootloader mode where you can flash/install the TWRP recovery.
If your Android device asks permission such as “Allow USB debugging” then just tap on OK to proceed. - If you have an A-only device, then execute the following command on the console:
fastboot flash recovery twrp-3.0.x.x-xxx.imgIf you have an AB device, then execute the following command:
fastboot flash boot twrp-3.0.x.x-xxx.imgIf you have a Huawei phone running on an Android version > 8.0 (Oreo or later) then use the below command:
fastboot flash recovery_ramdisk twrp-3.0.x.x-xxx.imgWhile executing this command make sure to replace the twrp-3.0.x.x-xxx.img with the actual file name of the TWRP that you have downloaded for your Android phone.
- Wait for the TWRP to be flashed. Once it is done execute the following command:
fastboot rebooton the command console and VOILA, your Android is now installed with TWRP recovery.
After executing all above steps in order, your Android will have the TWRP installed. If you want some more TWRP guides, like: how to wipe data or other partitions using TWRP or how to take backup using TWRP then the following links will help you:
– How to wipe Android partitions using TWRP
– How to take NANDROID backup using TWRPIf you have any concerns while installing TWRP on your Android then just login and reply back on this thread to get instant help.
-
AuthorPosts

- You must be logged in to reply to this topic.