GCam Port | Google Camera APK v9.6 (February 2025) › Forums › Forum for Common Topics (Generic Topics for all Devices) › Common Android How-To Guides › How to Backup All of Your Data on Any Android device, Step By Step Guide
- This topic has 0 replies, 1 voice, and was last updated 2 years ago by Linux User.
- AuthorPosts
- September 3, 2024 at 12:56 PM #3642Linux UserParticipant
This a very simple Beginner level Step By Step Guide explaining how to take Backup of all the Data on your Android Phone or Tablet such as: Apps, Contacts, Messages, Files etc. on Any Android phone or tablet. Yes, you read it right, this is the one guide which just works on any Android phone whether it be a Samsung, LG or Sony or any Android phone or tablet. No need to install a PC suite for LG, Samsung and Sony differently. This one guide will help you synchronize your data across devices.
If you are looking to have a complete backup of the current ROM which is called as a NANDROID BACKUP then definitely this is not the Backup Guide you are looking for. Below is the link for the same:
How to Take NANDROID BACKUP using TWRP recoveryIn our phone we have so many personal data, contacts, important files and many more. Sometimes you get updates for your device, or you may want to restore it to factory settings, or sometimes you may want to upgrade your device to a custom ROM like Cyanogenmod or something else then definitely you will not wish to lose your data at once right!!!
Introducing the MyPhoneExplorer Application which will help you to take backup of all the data on your Android device. Make sure you have at least half an hour of time to set it up and understand properly what it can do for you. This application works on Windows and Linux systems only as far as I know. Just follow the below steps to install the MyPhoneExplorer Windows Applicaiton and also the cient App from on your Android Device.
NOTE:
This data backup process is only meant for Android devices.
To take backup of your data you need to have a Windows or a Linux machine.You need to have connectivity to the computer in the either of the following mentioned ways:
– Wi-Fi
– Bluetooth
– USB data cableHow to install the MyphoneExplorer application:
Download the MyPhoneExplorer application for Windows OS from the link provided below:
MyPhoneExplorer application download linkAfter downloading the application please follow the below steps to install the application:
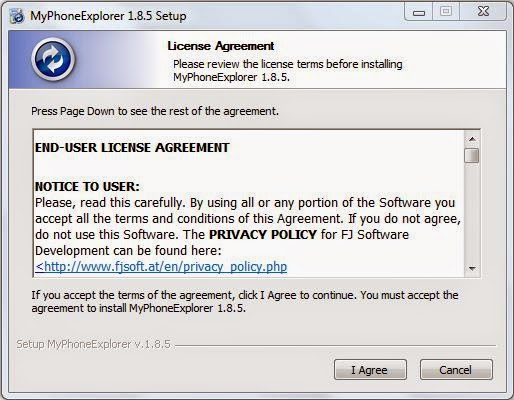
STEP 1:Double click on the downloaded file and agree to the license agreement. Click on I Agree to proceed.
 [Accept the license agrrement of the software]STEP 2:
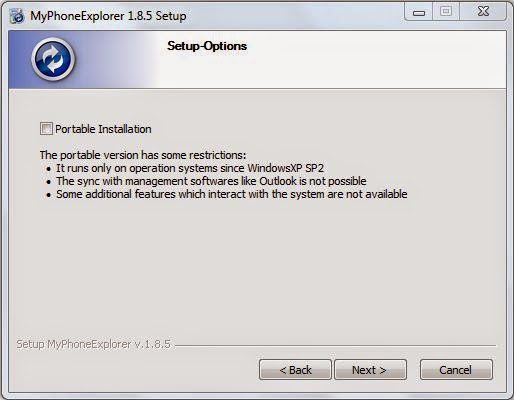
Click on Next and be informed that NOT TO click on the portable installation check box.
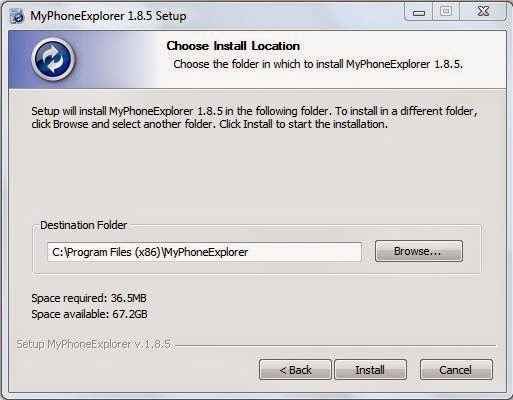
[Click on Next]STEP 3:Select where you want to keep the application files. Better not to change anything and just click on Install.
 [Click on Install to start installation]
How to synchronise your phone with the PC:
Download and Install the MyPhoneExplorer Client application for your Android device from the link provided:
MyPhoneExplorer Client download link on Play StoreNOTE:
Make sure you run the Client application on your phone before you run the application on your PC and your phone is connected to your PC.
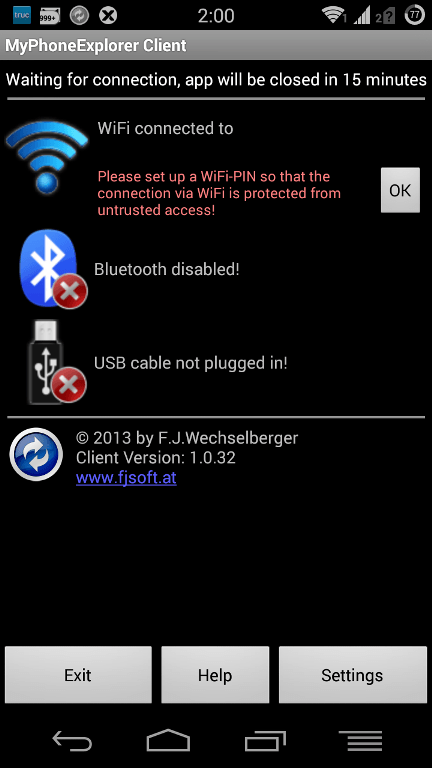
I have connected my device to my PC via Wi-Fi connection so It shows that it is “WiFi connected to”. [MyPhoneExplorer Client app on my Android phone]STEP 1:
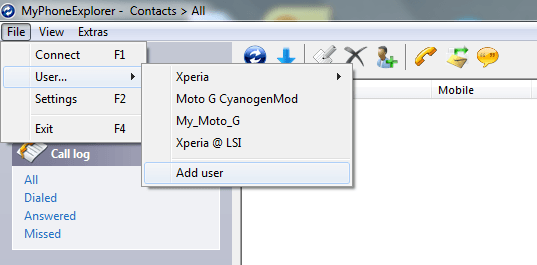
Open File > User > Add user.
 [Add a user on the application]STEP 2:
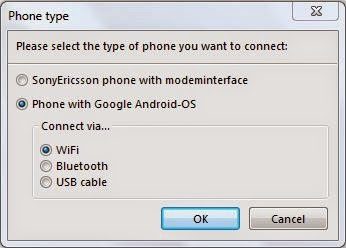
In the next dialog box that pops up select “Phone with Google Android-OS” and select the mode of communication for the “Connect via…” section.
As I am connecting my phone to my PC I am selecting WiFi. [Select the communication type between your PC and your phone]
Before connecting you have to do one more thing.
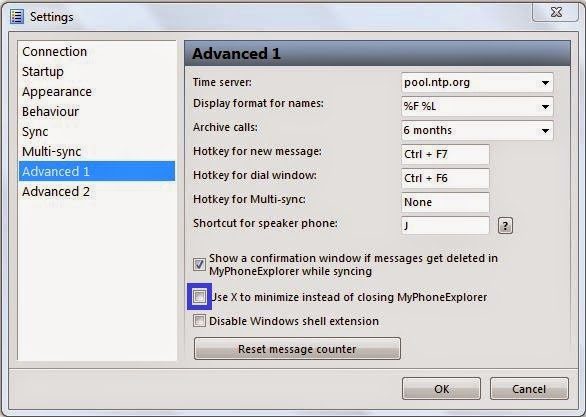
Go to File > Settings and then Go to the Advanced 1 TAB and select the “Use X to minimize instead of closing MyPhoneExplorer” check box.This will now close your application when you will click the close button on your right side.
Because if your application is closed then the connection to your device will also be lost. [Extra setup]STEP 3:
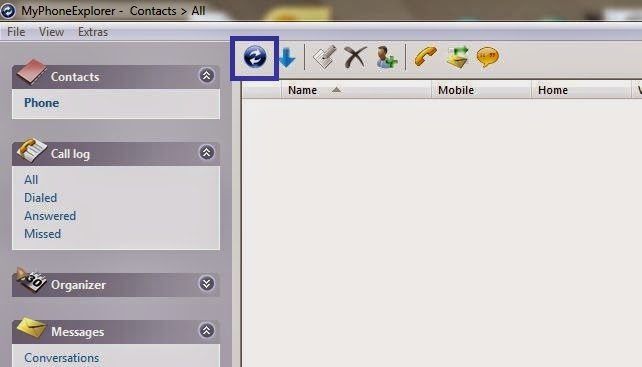
Click on the Synchronise button to start the connection.
 [Start synchronisation]
How to take backup of your Android phone data:
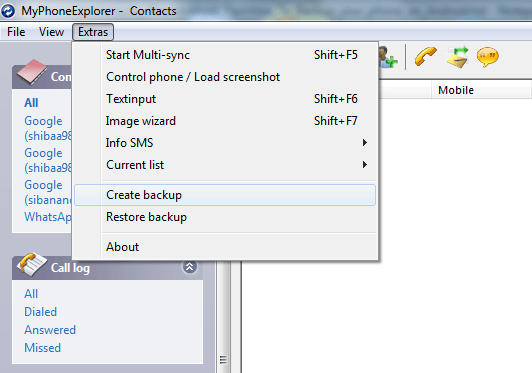
STEP 4:After synchronization has been completed you can now take a backup of all your contacts, calendar data, messages and your files and even the applications installed.
Go to the following path on the application as shown in the below image.
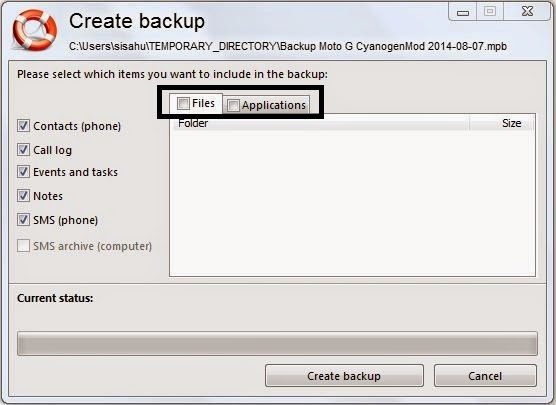
 [Backup your data]
You can select the Files and then select a folder where to keep the files on your local computer.
Similarly you can select applications and then select a folder on your local machine where you want to keep the Android application files. [Backup your files and application data]
Now you sit back relaxed till the application takes all the backup of all your phone data. If you want to have a complete backup of the current ROM then you can try the TWRP NANDROID Backup Guide.
- AuthorPosts
- You must be logged in to reply to this topic.