GCam Port | Google Camera APK v9.2 (April 2024) › Forums › Samsung Device Forums › Galaxy Alpha (Exynos) – G850F, G850T, G850M, G850FQ, G850Y › Rooting Galaxy ALPHA and installing TWRP custom recovery
Tagged: Galaxy Alpha, Rooting Guide, Samsung
- This topic has 0 replies, 1 voice, and was last updated 8 years ago by Linux User.
- AuthorPosts
- March 29, 2016 at 11:42 AM #2839Linux UserParticipant
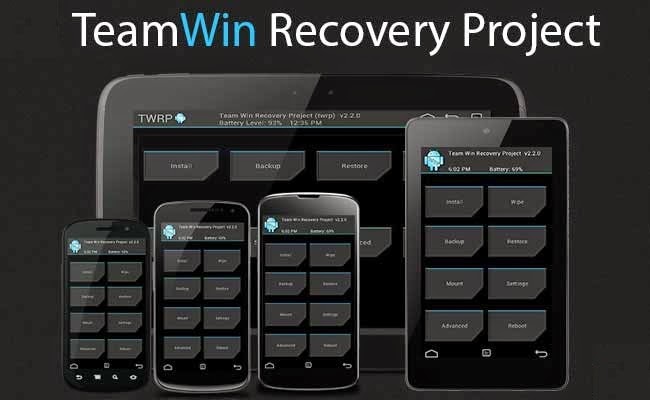
This guide will tell you how to rooting Galaxy ALPHA and how to install a TWRP custom recovery on your Samsung Galaxy ALPHA (SM-G850F). A custom recovery is the world to some beautiful custom ROMs for your device. If you agree with me then you do understand the need of a custom recovery for a device. Samsung Galaxy ALPHA was recently released to market and today we have the TWRP custom recovery for that. With this first custom recovery you will also see some custom ROMs like Cyanogenmod 12, Paranoid Android and more for Samsung Galaxy ALPHA in near future.
After installing TWRP recovery you can install many android mods such as GCam APK, enable navigation gesture, enable face unlock, viper4android etc. and many more.
DISCLAIMER:
Installing custom recovery on your device may VOID your warranty and may delete all your data. Before proceeding further you may consider backup your all data. Understand the fact that you are the only person responsible for everything that you do with you device. If you blame me for a disaster that happened to your device then I will simply laugh at you.
[Galaxy Alpha TWRP Custom recovery and Rooting guide]
Before going into details make sure that you have the following things in hand to start with the recovery installation guide.Things required for Rooting Galaxy ALPHA and installing TWRP custom recovery guide:
- Download and install KIES that contains driver for Galaxy ALPHA
- A Linux/Windows PC or a MAC installed with Fastboot and adb binaries:
– 15 Seconds ADB Installer for Windows
– Minimal ADB and Fastboot for Windows
ADB Fastboot Installation guide for Linux or MAC - Latest SuperSU by chainfire
- TWRP Recovery Download link for Galaxy ALPHA
- Download Samsung ODIN flashing application
- Enough time with a smart and cool brain
You may follow the below link to backup all the data on your android device:
Step by step guide to take full backup of your phone dataSTEP by STEP recovery installation guide for Galaxy ALPHA:
If you already have ROOT then follow this process to flash the recovery easily.
Download the latest recovery file in img format from the above link and copy it in the sdcard.
Access to your phone’s console by using adb or terminal emulator app and type the below commands:$ su
# dd if=/sdcard/recoveryfilename.img of=/dev/block/mmcblk0p10
That’s all.
And make sure that you enter the command right.If you don’t have ROOT on your phone then follow this below guide.
STEP 1:Put your phone into download mode.
Press and hold these three buttons until you see a WARNING SCREEN! to enter into the download mode:
Volume DOWN keys + Power key + Home keyWhen you see the WARNING SCREEN press the volume UP key to continue into the recovery mode.
STEP 2:Open the ODIN application on your PC.
Connect your phone(while it is still in the download mode) to the PC using a USB cable.
ODIN will show an Added! message on the message box.
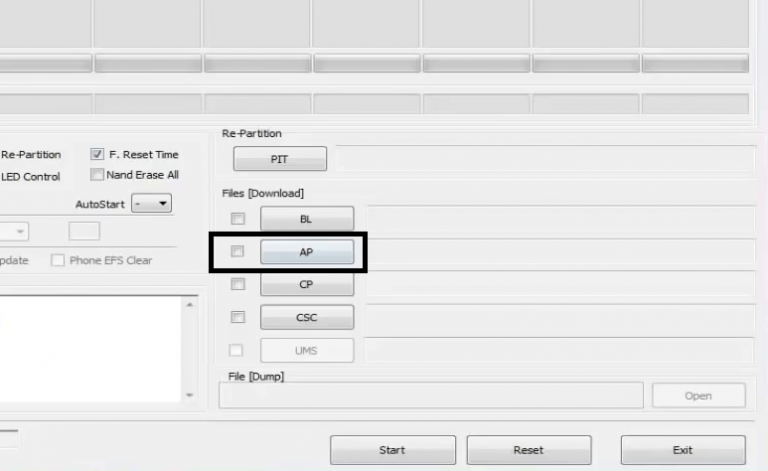
[Device added on the ODIN screen]STEP 3:Click on the AP button on the ODIN application and select the CWM recovery file.

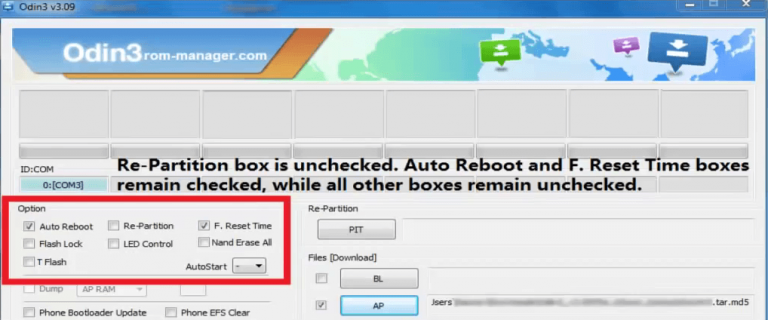
[Click on the AP button and select the recovery file]STEP 4:Select the appropriate options before flashing the recovery image.
only the Auto Reboot and F. Reset Time
Make sure all other boxes are un-checked.
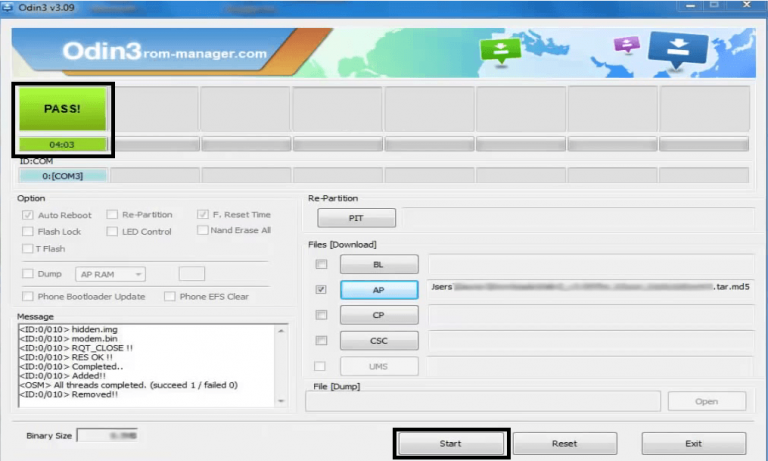
[Select the options]STEP 5:Select the start button, which will start the flashing process.
When you get the PASS message, then your phone will reboot automatically.
[Click on Start and wait till it completes]You may disconnect your phone and proceed for the next process from here on.
Rooting Galaxy ALPHA using the custom recovery:
NOTE:
Rooting guide will only work after the custom recovery installation.
If you will SKIP the custom recovery installation process and perform only these steps then rooting will not be done.STEP 1:Copy the Flashable ROOTing zip file that you have downloaded to your SD card.
STEP 2:Press and hold these three buttons until you see a WARNING SCREEN! to enter into the recovery mode:
Volume UP keys + Power key + Home keyWhen you see the WARNING SCREEN press the volume UP key to continue into the recovery mode.
STEP 3:Select the Install option in the TWRP recovery screen and Select the BETA-SuperSU-v2.xx.zip zip file where you have kept in the SD card.
Wait for the flashing to be done and then reboot your phone.After successfully completing all the above mentioned steps your device will be rooted. That’s all… have fun.
Stay tuned or Subscribe to the Galaxy Alpha forum For upcoming Android Nougat ROMs, CyanogenMod Custom ROMs, other ROMs and all other device specific topics. - AuthorPosts

- You must be logged in to reply to this topic.